Domain settings
The Settings tab is where you manage the settings for your domain in CookieHub. It is divided into five sections: General, Consent storage, Regional Settings, Languages and Categories.
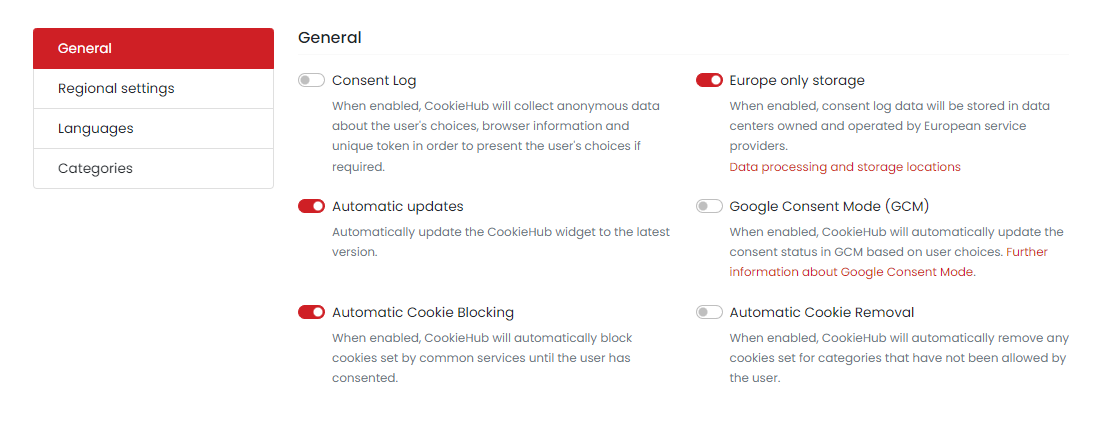
General
In the General section, you can enable or disable general settings for your domain. This includes options such as:
- Consent Log: When enabled, CookieHub will collect anonymous data about the user’s choices, browser information, and unique token in order to present the user’s choices if required.
- Automatic Updates: Automatically update the CookieHub widget to the latest version.
- Automatic Cookie Blocking: When enabled, CookieHub will automatically block cookies set by common services until the user has consented.
- Europe Only Storage: When enabled, consent log data will be stored in data centers owned and operated by European service providers.
- Google consent mode (GCM): When enabled, CookieHub will automatically update the consent status in GCM based on user choices.
- Automatic Cookie Removal: When enabled, CookieHub will automatically remove any cookies set for categories that have not been allowed by the user.
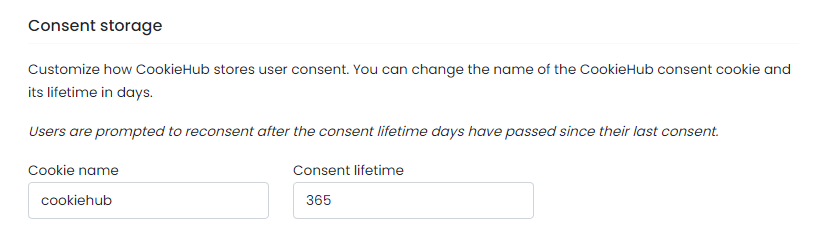
Consent storage
This section allows you to customize how CookieHub stores user consent. You can change the name of the CookieHub consent cookie and its lifetime in days. By default, the consent cookie is called “cookiehub” and has a lifetime of 365 days.
Users are prompted to reconsent after the consent lifetime days have passed since their last consent. This means that if a user gave consent to cookies on your website and the consent lifetime is set to 365 days, they will be prompted to give consent again after 365 days have passed. This is to ensure that users have control over their data and can change their preferences over time.
Regional settings
Customize CookieHub’s behavior and policy frameworks based on the location of your website’s visitors.
More information about regions
Languages
In the Languages section of the Settings tab, you can configure the language settings for your CookieHub widget.
More information about languages
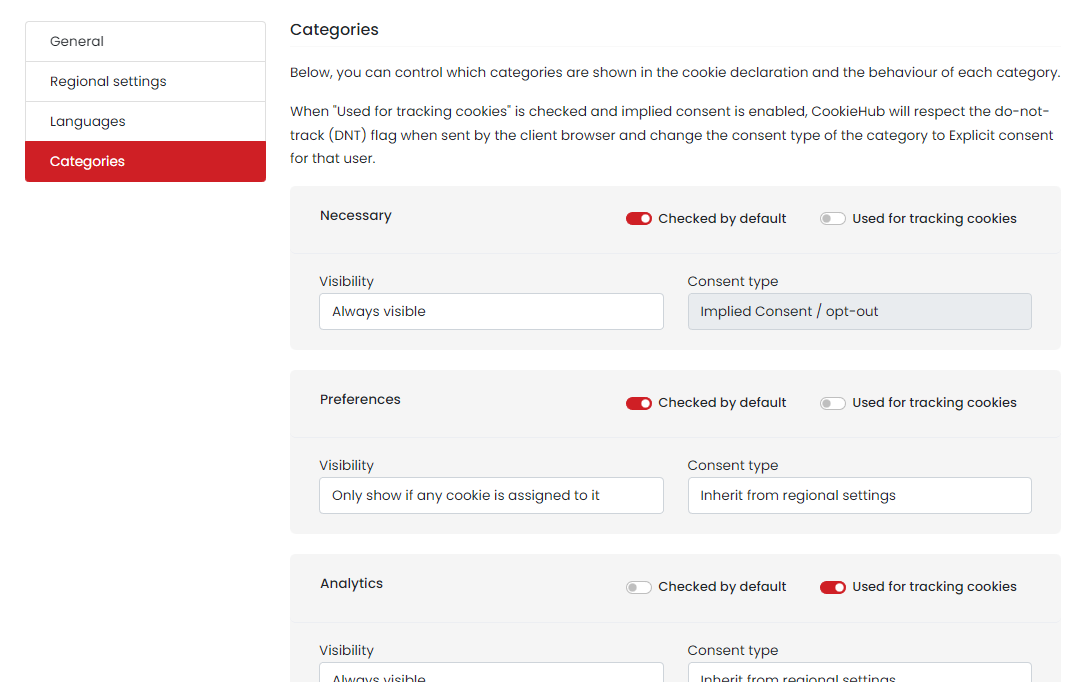
Categories
In the categories section, you can configure default settings for all categories in CookieHub. These settings can then be overridden for specific regions from the regional settings section or in the Customize dialog.
The following settings can be customized for each category:
- Checked by default: This sets the default checkbox state for the category when the user hasn’t yet consented.
- Used for tracking cookies: If this is checked, CookieHub will override the “Checked by default” state and set it to unchecked if the user’s browser sends the “do-not-track” flag.
- Visibility: This setting controls how to determine whether to show the category or not. It can be set to “Always visible”, “Always hidden”, or “Only show if any cookie is assigned to it”.
- Consent type: By default, CookieHub will use the consent type specified for the region. However, this can be overridden here to always use “Implied consent / opt-out”.